
How to Spot an AI-Edited Damage Photo: 7 Checks You Can Run Yourself
To check whether a damage photo was edited by AI, run seven independent checks: read the file's metadata, run error level analysis, compare noise across the damaged and undamaged areas, look for frequency-domain artefacts, hash the image against past submissions, test the damage against physical logic, and request a second photo taken now.
No single check below is conclusive, and any of them can be defeated on purpose. Their value is combined: an edit that survives metadata analysis, error level analysis, noise comparison, spectral analysis and a fresh second photo is a great deal of work for a $74 backpack. Run them in the order given and stop as soon as you have enough to ask for the item back.
1. Read the metadata before anything else
Every camera writes EXIF metadata into a photo: device model, lens, exposure, timestamp, often GPS. Most AI editors either drop that block entirely or write their own generator tag into it. Some are blunt enough to leave a visible watermark — the widely-shared r/ShopeePH case involved photos that still carried a Gemini AI mark.
- Green flag: a plausible phone model, a timestamp near the delivery date, and an exposure that matches the lighting you can see.
- Amber flag: no metadata at all. Normal for anything sent through WhatsApp, Messenger or Instagram, so this alone means very little.
- Red flag: a software tag naming an AI tool, a timestamp before the order was placed, or GPS coordinates nowhere near the delivery address.
2. Run Error Level Analysis (ELA)
JPEG compression degrades an image slightly every time it is saved. Error Level Analysis re-saves the photo at a known quality and subtracts the result from the original, which makes regions that have been through a different compression history glow against the rest of the frame. A patch painted in by an editor and saved once, sitting inside a photo saved three times, has a different error level — and it shows.
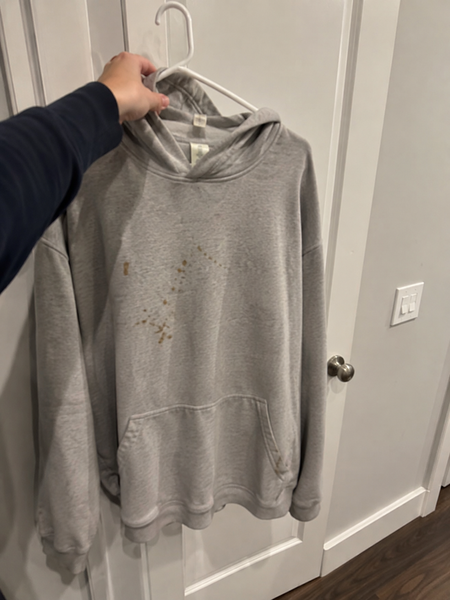
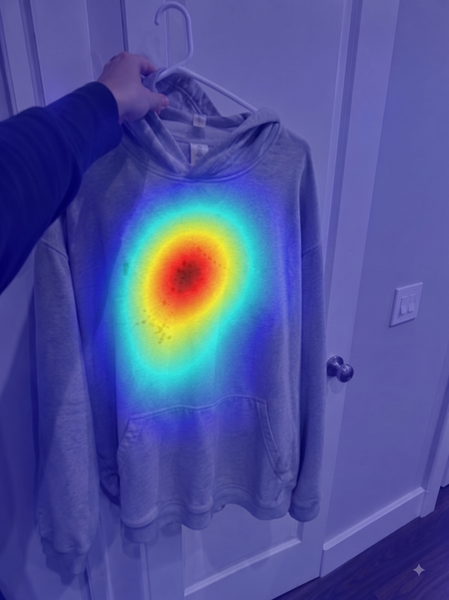
What you are looking for is not brightness anywhere, it is localised brightness that coincides exactly with the claimed damage while the surrounding material stays flat. Heavy re-saving — a screenshot of a forward of a share — flattens everything and makes ELA unreadable, which is one more reason to insist on the original file.
3. Compare noise between the damage and everything around it
Every camera sensor lays down a faint, consistent grain across the whole frame. Generated pixels have their own, different texture — often smoother than the real thing. Subtract a blurred copy of the image from the original and you get a noise-residual map, where a synthetic region reads as a suspiciously clean hole in an otherwise uniform field of grain.
This is the check that catches the most convincing edits, because matching a specific sensor's noise profile is not something consumer AI tools attempt. On the stained hoodie above, the stains light up while the weave beside them stays cold: a real spill soaks into the fabric and carries the same grain as the fabric. A painted one sits on top of it.
4. Look for frequency-domain artefacts
Diffusion and GAN models build images through repeated upsampling, and that process leaves periodic patterns which are invisible to the eye but obvious in a Fourier (FFT) view of the image: a regular grid or a starburst of energy where a natural photograph shows a smooth falloff. This one is technical enough to need a tool, but it is one of the hardest signals for a fraudster to remove, because removing it means degrading the image they need to look convincing.
5. Hash the image against everything you have received before
A perceptual hash (pHash) is a short fingerprint of what an image looks like, so it survives resizing, re-saving and small crops. Store one for every photo a customer sends you and you can answer a question no forensic check can: have I seen this picture before?
Serial refund fraud is lazy by nature. The same "damaged" hoodie photo gets submitted to a dozen stores, and a near-identical image arriving twelve days apart on two different orders is stronger evidence than any pixel-level signal — it is behavioural, and behaviour is much harder to fake than a texture.
6. Test the damage against physical logic
Before any tool, ask whether the damage could have happened in the physical world at all. AI editors are excellent at texture and poor at consequence.
| Ask | What a fake usually looks like |
|---|---|
| Does the damage have depth? | A crack that is drawn on the surface with no shadow inside it, and no lip where the material broke. |
| Does it stop at an edge? | Damage that ends exactly at the boundary of the object, as if masked, rather than continuing round a curve. |
| Is there debris? | A torn seam with no loose threads. A shattered screen with no fragments. Real damage leaves evidence beside it. |
| Does the light agree? | A dent whose highlight faces a different direction from every other highlight in the photo. |
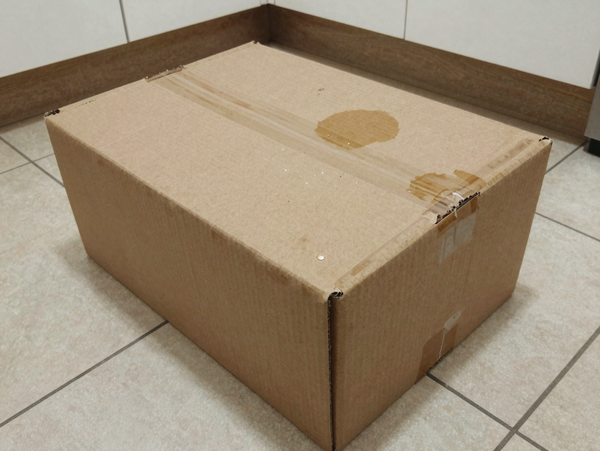
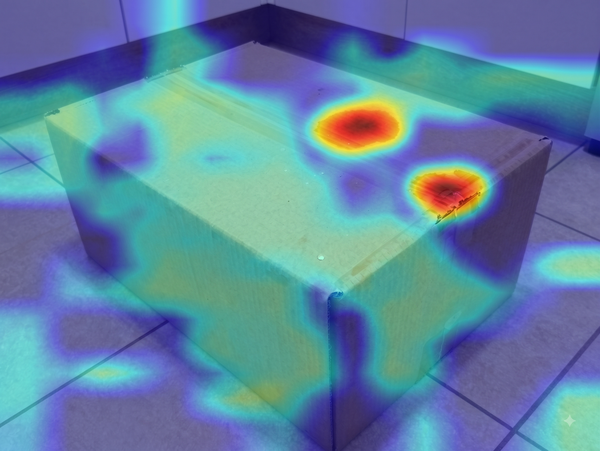
| Does the packaging agree? | A crushed item inside an intact box — the single most common inconsistency in reported cases. |
7. Ask for a second photo, taken right now
This is the strongest check available to any merchant and it needs no software at all. Ask for one more photo of the same damage from a different angle, taken now, with something specific in frame — today's date on a scrap of paper, or the shipping label beside the damage.
An honest customer sends it in two minutes. A fraudster now has to reproduce the same fake damage, in the same place, under different lighting, at a different angle, consistently. That is a genuinely hard image-editing problem, and the usual response is either silence or a sudden change of story. Either way the claim resolves itself.
Frequently asked questions
What is Error Level Analysis in simple terms?
It re-saves a JPEG at a known quality and compares that against the original. Areas that have been through a different number of saves — like a patch pasted in by an editor — show up brighter than the rest of the image. It is a free, well-established forensic technique, but it is unreliable on heavily re-saved images such as screenshots.
Can a fraudster defeat all seven checks?
In principle, yes — with effort. They would need to preserve plausible camera metadata, match the sensor noise profile, avoid frequency artefacts, use an image never submitted anywhere before, make the damage physically coherent, and reproduce it from a second angle on demand. That is a professional workflow for a claim usually worth under $200, which is exactly why layering the checks works.
Do I need to buy software to run these checks?
No. Metadata, physical logic and the second-photo request cost nothing and catch a meaningful share of attempts. ELA, noise maps, FFT analysis and perceptual hashing need tooling to be practical at volume, which is where an automated scan earns its place.
How many claims should I expect to flag?
Across the merchants this problem was researched with, a flag rate in the 5–15% band is the realistic expectation, and most of those resolve as genuine after review. If a tool flags far more than that, it is producing false positives and will cost you customers.
Sources
- r/ShopeePH — AI-watermarked damage photos in refund claims
- Independent evaluation of AI-image detectors on locally edited images (academic, 2026)
- Hive AI — AI-generated image classification pricing
- TruthScan — localized-edit detection and heatmaps
About the author
Arijit Mandal — Founder, Sorquil. Builds return-fraud tooling for Shopify merchants. Spent August 2026 collecting and re-testing real AI-edited damage photos from public refund-scam reports before writing a line of detection code. [email protected]